8 Fall Chores You Can't Afford to Ignore
Follow this winter-preparedness checklist for your home now—and reap the rewards in the months to come
When you shop through retailer links on our site, we may earn affiliate commissions. 100% of the fees we collect are used to support our nonprofit mission. Learn more.

Fall is the right time to get your yard and house in order because, come winter, small problems can turn into expensive nightmares.
Tasks to Tackle Outdoors
Try to do these jobs before the first snowfall. Waiting until winter makes them harder to accomplish (or impossible) and adds to the cost.
Deal With the Leaves
Fallen leaves can kill grass when they’re matted down by snow or leave stains on decks or walkways. Leaf piles can also attract rodents.
What to do: Rake fallen foliage onto grassy areas, or better yet, use a leaf blower. Then make use of your lawn mower’s mulching mode. It will grind up the leaves into fine pieces that biodegrade right into the soil, nourishing your lawn in the process. You might need to make a few passes to slice the leaves small enough to decay. Try to do it as leaves fall so you don’t end up with a massive pile.
What you save: Along with saving the cost of leaf bags, you avoid the back-breaking process of stooping, bending, and lifting. If you need a new mower or leaf blower, the options below are best in class.
Check the Roof
Leaks can eventually damage the wood sheathing and rafters below your shingles, leading to expensive repairs at a time when they’re difficult to make.
What to do: Use binoculars to spot cracked, curled, or missing shingles safely from the ground. Consider having a roofing pro check metal flashing around chimneys, skylights, and roof valleys for leaks and the rubber boots near vents for cracks that can let moisture seep in. If you need repairs, the same roofing pro should be able to make them or refer you to a licensed roofing contractor.
What you save: At roughly $4 per square foot installed, new sheathing would cost around $10,000 for a 2,300-square-foot house if you had to replace all of it. Figure on an additional $10,000 to $15,000 to install new shingles, plus added costs if the roof rafters need replacing. Worst case and you need a new roof? See three of CR’s top-rated shingles, below.
Clear Gutters
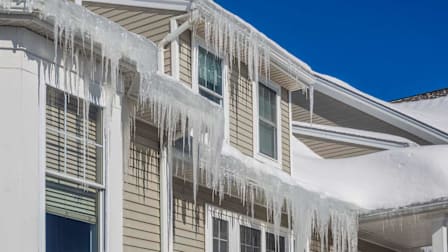
Gutters stuffed with leaves, pine needles, and other debris can let water spill over the side, pool around your home’s foundation, and seep inside. Water that freezes in gutters can force snow and ice into roof shingles, causing damage and leaks.
What to do: Consider a gutter-guard system—comprised of perforated panels that pop into your existing gutters, blocking leaves while allowing in water—to keep the debris out. Use a tape measure to make sure that gutter drains extend 5 feet from the house and use a level to confirm that your gutter outlet is angled down so water can escape freely, away from the foundation. According to Home Advisor, it costs about $1 per linear foot for a pro to clean gutters in the fall and spring. You’ll can tackle the job yourself, but hiring a pro may be worthwhile, especially if you’re uneasy on ladders.
What you save: Keeping gutters clear can help you avoid costly foundation repairs, which can easily creep into the thousands.
Close Your Hoses
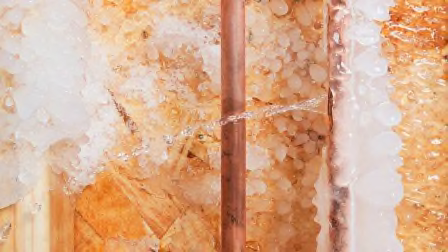
Pipes can burst when water inside expands as it freezes, creating an expensive mess in your home.
What to do: Shut off inside valves that control water flow to hose spigots. Then briefly open the spigots to drain any leftover water in pipes and hoses. Also drain water from supply lines for water sprinklers and pools, and shut off inside valves that control them. Help prevent freezing by insulating pipes in unheated areas. You can buy pipe insulation at home centers for about 50 cents per foot. It’s an easy DIY job, as long as you have access to your pipes.
What you save: You can avoid paying thousands of dollars in plumbing repairs and water damage, especially if pipes burst and cause a flood while you’re away.
Chores Inside the Home
If your house is drafty and your furnace needs maintenance, you’ll be paying more to keep warm this winter than you have to. With a little caulk and some elbow grease, you can tighten the building envelope of your home. Your furnace is less likely to fail on a cold day if you do some quick maintenance now.
Automate Energy Savings
Simply lowering temperatures by 7° F to 10° F from your normal setting while you’re at work or asleep can trim 10 percent from your heating bill.
What to do: You can lower temperatures manually on any thermostat or install a smart or programmable thermostat to do it for you. Smart thermostats use a combination of motion sensing and pattern recognition to automate dropping the temperature at night or when you’re away.
What you save: By being mindful of the temperature, you can figure on 10 percent off the cost to heat your home, which varies widely depending on location and fuel type. The thermostats below are tops in our tests and may pay for themselves in no time.
Plug the Leaks
The swiftest savings come from sealing air leaks in your home’s walls, windows, and especially its ductwork.
What to do: Sealing and insulating your home’s air ducts are best left to a professional, but you can seal simpler leaks and cracks (such as for a window) on your own. Use a combination of caulk, foam board, expandable sealant, and weather stripping to plug leaks around windows, doors, electrical outlets, and other openings.
What you save: Plugging leaks and, if necessary, adding insulation could lower your annual heating and cooling bills by about 15 percent.
Replace Furnace Filters
A dirty filter reduces heat and airflow, which can lead to expensive repairs.
What to do: Check the air filter in the furnace or heat pump each month. And have a pro check the system annually (about $50 to $100)—tightening electrical connections, lubricating moving parts, and checking drains, controls, and connections for oil and gas systems.
What you save: Doing annual maintenance can help you avoid unplanned repairs, which cost about $350 for an average repair and potentially more if it’s an emergency or outside of normal business hours.
Clean Your Chimney
A wood-burning fireplace or stove may be cozy, but creosote (smoke residue) buildup can impede the flow of smoke and cause chimney fires and carbon monoxide poisoning. Even unused chimneys can develop cracks that weaken the structure.
What to do: If your chimney hasn’t had a recent inspection or cleaning, now’s the time. Figure on about $250 for a typical cleaning. Go to the Chimney Safety Institute of America’s website to find industry-certified chimney sweeps, and check with the Better Business Bureau for complaints.
What you save: Annual sweepings will help your flue last longer and work more efficiently, saving you about $2,500 over the cost of a premature replacement.


