Salsa Showdown: Blender vs. Molcajete vs. Store-Bought
Plus: How to know if you have a real molcajete made of volcanic rock and learn care tips for your mortar and pestle
When you shop through retailer links on our site, we may earn affiliate commissions. 100% of the fees we collect are used to support our nonprofit mission. Learn more.

Salsa or guacamole and chips are some of my go-to appetizers at my favorite Mexican restaurant. When I have tacos on the week’s meal plan, salsa is an ingredient that I have to have on my grocery list too. Usually, I go the store-bought route instead of making my own, but I wondered how easy it would be to make it myself.
- Our Salsa Showdown: The Recipe Preparation Taste Test Molcajete Care Tips
The Salsa Recipe
Because I had never made salsa from scratch, I spoke with Iliana de la Vega, chef and owner of El Naranjo, a Mexican restaurant in Austin, Texas, and a 2022 James Beard Foundation award winner. De la Vega has created menus and trained chefs in hotels, restaurants, and universities including Stanford and the University of Massachusetts. She also leads culinary trips with her anthropologist and journalist daughter all over Mexico through her tour company, Mexican Culinary Traditions.
The salsa recipe she shared with me was simple and required just four ingredients. A good salsa requires just two things: “quality ingredients and the right amount of spice,” de la Vega says. The recipe was for making salsa in a blender, but no adjustments are needed for a molcajete or immersion blender.
Salsa
Makes 1½ cups of salsa.
2 serrano chiles, stems removed
1 garlic clove, unpeeled
4 Roma tomatoes, ripe
1 teaspoon salt
Directions
- Dry roast the chiles, garlic, and tomatoes on a comal (a smooth, flat cast-iron griddle) over medium heat.
- Remove the garlic when the papery skin begins to brown. Peel and discard skin.
- Keep turning the tomatoes and chiles until soft and blackened on all sides. Remove and set aside.
- Place the tomatoes (don’t peel them) and garlic in the blender, add chiles to taste. Season with salt.
- Pulse the ingredients in the blender for 10 seconds.
Blender vs. Molcajete Preparation
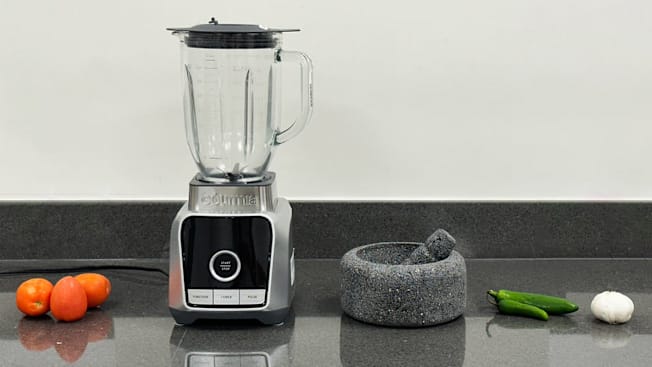
The only difference between the two methods is that the molcajete required manual grinding of the ingredients whereas the blender did all the grinding for us. The first step in de la Vega’s recipe is to dry roast the serrano chiles, garlic, and tomatoes. Because we used a small, 4-quart stainless steel pan instead of a comal, this took a little longer in our kitchen, but we were able to soften the chiles and tomatoes just enough to easily grind in the molcajete.
After the ingredients had been blackened and softened, we placed them in the blender with some salt and pulsed for about 10 seconds. Almost immediately, the tomatoes, chiles, and garlic became a smooth, watery salsa. Dry roasting and blending took a total of 15 minutes.
For our traditional molcajete salsa, I placed the three main ingredients in the mortar one at a time, grinding each down well with the pestle before adding the next item.
The chiles and garlic were soft and required little effort to grind. The tomatoes were soft too, but grinding them without getting water all over myself required a more gentle grind.
Finally, I sprinkled some salt over the lumpy salsa, ground it once more to ensure the salt was evenly distributed, and transferred the salsa to a clean bowl.
This process took a few minutes longer than the blender salsa but wasn’t as labor-intensive as I expected it to be.
Where to Buy
Shop for the Masienda molcajete at Masienda.
Blender vs. Molcajete vs. Store-Bought Salsa Taste Test
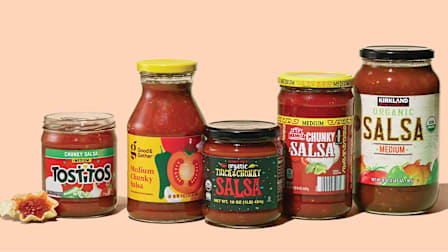
After I made both salsas, I invited eight of my colleagues to taste them along with a store-bought version, Tostitos Chunky Salsa. I placed all three in unmarked bowls and bought some of our favorite chips for dipping during our taste test.
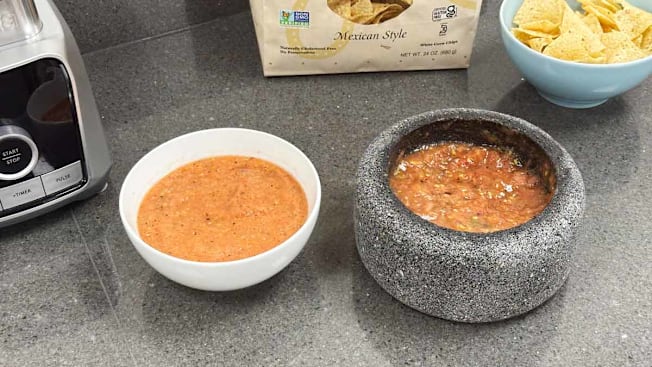
The blended salsa’s flavors were great—refreshing and spicy—but the smooth texture was not my favorite for dipping chips. It was much too watery to really enjoy as a dip.
De la Vega suggested using the pulse function on a blender to get a chunkier salsa consistency, which we did, but we pulsed for too long. A shorter pulse time might have made this salsa more comparable with the molcajete and store-bought salsas.
I’d likely save this for pouring over tacos instead. None of the eight testers who tasted the three salsas selected this one as their favorite for eating with chips either. Several of our tasters said this salsa reminded them of puréed tomatoes.

Photo: Consumer Reports Photo: Consumer Reports
The taste of the molcajete salsa was noticeably different from that of the blender salsa—it was spicier, and the blackened bits of tomato and chiles still visible through the chunks of red tomato added a delicious charred flavor.
The texture was significantly less watery than that of the blender salsa, too. For me, it was perfect for chips. Four of our eight testers agreed with me. One of the testers said that the “texture makes you enjoy the flavor more.” Another mentioned that it had a “deeper flavor” and was spicier than the blender salsa.
The last four of our testers actually said they preferred the store-bought salsa over both of the homemade salsas.
Tips to Shop and Care for Your Own Molcajete
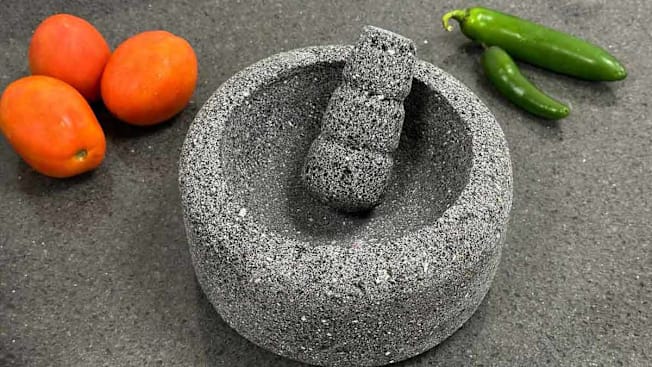
Not every molcajete you see online is made the same. Traditional molcajetes are made from volcanic stone, not cement. According to de la Vega, because they are made from volcanic stone, they should not look perfect, and though the material is porous, it should not leak either. “If it’s too perfect, it’s cement,” she says.
To ensure your mortar isn’t leaking, you can simply pour water into it and watch for any leaks. The last thing de la Vega says you want to consider is the pestle. The “mano” should feel comfortable to hold.
If you’re planning to regularly make salsa or guacamole for a crowd, you’ll want to opt for a larger molcajete. However, the larger the size, the heavier the molcajete, so you’ll have a hard time storing a large-sized model in a high cupboard. The larger size from Masienda has twice the capacity of the smaller 2-cup molcajete we used but weighs 12 pounds more. (Most of the molcajetes available online list the capacity in the product description.)

Photo: Consumer Reports Photo: Consumer Reports
Before you use a molcajete for the first time, you have to season it. When I first heard this, I thought of the seasoning required when you purchase a new unseasoned cast-iron pan. The process looks very different for a molcajete though.
I used the instructions printed on the user manual included with our molcajete from Masienda. I poured a half-cup of uncooked rice into the molcajete, ground it into a fine powder, disposed of the powder, and repeated this process until the ground rice did not take on a gray color during the grinding process.
Some people use salt for seasoning a molcajete, but de la Vega says rice is best.

For years, the traditional way to cure a molcajete has been rice, and it works perfectly. So I would choose uncooked rice as it is harder than any salt.
Chef and Owner of El Naranjo in Austin, Texas
Per the instructions on Masienda’s site, you should not use any soap to clean any parts of a molcajete. Just water and a stiff brush to get any gunk out of the small holes.
If you plan to store your molcajete in a cupboard, you also want to make sure that it is completely dry before doing so.
To prevent any scratches on your kitchen counters, you should place a towel underneath the molcajete while using it.
@consumerreports Before using a molcajete for the first time, be sure to season it. Learn more through the link in our bio. #foodtok #salsa #hispanicheritagemonth
♬ original sound - Consumer Reports

