Best Window Films From Our Tests
They can help keep your home cool without sacrificing the view—unless you want some privacy, too
When you shop through retailer links on our site, we may earn affiliate commissions. 100% of the fees we collect are used to support our nonprofit mission. Learn more.
While I don’t cover the cost of cooling or heating for my apartment in New York City, I’ve dealt with the pain of a too-hot home for several years now. My bedroom and living room have windows that span from floor to ceiling (9 feet), and my building management has strict control over how cool I can set the thermostat.
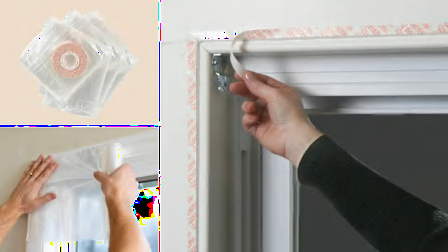
On most summer days, I keep the shades down to help cool my space, but then I lose the view. One solution to the problem is using window film. While you can book a professional installer, it turns out it’s also an easy DIY project as long as your windows aren’t too big.
- Window Films We Tested: BDF Coavas Gila Greenfilm
- How We Tested
- Tips for Neat Installation
Ease of use: Greenfilm’s window film was one of the easiest to install due to its thickness and the ease of peeling away the backing. It didn’t stick to itself even without spraying any soapy water on it. (Manufacturers recommend this to prevent the film from clinging to itself during installation.) All of the other products tested had a thin, plastic liner that was difficult to separate from the film.
This was one of two films that I was able to apply without creating any bubbles. The instructions were easy to follow and I didn’t have any difficulties during any part of the process.
Performance: Even with its slight blue tint, it didn’t affect visibility through the window, and scratching at it didn’t leave any marks or cause it to rip. It was the most transparent of the four products tested. Greenfilm is the only product that is said to be reusable. After trying all four, I would only recommend reusing this and the Coavas products. The thinner products from Gila and BDF require a significant amount of effort to keep them from sticking to themselves during removal. While not impossible to get the thinner films flat again, it’s a tedious task.
After six days in a freezer, the film installed on a window didn’t show visible changes. The film remained firmly adhered to the glass even along the edges. Applying heat to the film didn’t cause it to change, either. No residue was left behind on the windows after the film was removed.
While I didn’t test the ability of any of the films to block out light, this product is claimed to block 99.9 percent of UV rays, 85 percent of infrared (IR) rays, and 17 percent of light, with a visible light transmission of 73 percent.
Ease of use: BDF’s film was the second one I successfully applied with zero bubbles after squeegeeing. Though it’s very thin, it didn’t cling to itself as much as the slightly thinner Gila film. The instructions were very thorough, and I found the FAQs helpful, too. It’s the only film that arrived with two of the tools necessary for installation: a box cutter and a small squeegee.
The one thing I struggled with was removing the backing from the film. Because both the backing and film are very thin, it was difficult to separate the two. I had a hard time even when I followed the instructions for separating them using two pieces of tape. Folding down a corner until the two pieces separated worked for me after a few tries.
Performance: Like every other film I tested, cold and hot temperatures didn’t affect the film’s adhesion to the window glass. No bubbles formed under this film after it was allowed to sit for several hours at room temperature. Scratching at the film produced no rips or scratches, even when I purposely tried to catch my nails on the edges of the film. After removing the film from the window, no residue was left behind on the glass.
The tint on this window is slightly yellow but didn’t affect visibility through a window significantly. According to BDF, this film “rejects about 45 percent of the total solar energy coming from the sun” and 99 percent of the sun’s UV rays, with a visible light transmission of 68 percent.
Removing Window Film
All of the window films were easily removed from our test windows, with no residue left behind.
Ease of use: Coavas’ film was as thick as the Greenfilm version, which made it almost as easy to install. But the instructions on the packaging were minimal and included several spelling errors. After a significant amount of squeegeeing, I was unable to get all of the bubbles from underneath this film. Aside from that, the installation went smoothly, although, as with the two others with thin plastic backing, I struggled to remove it from the film.
Performance: This was the darkest tinted film. It didn’t completely block visibility through the test window but significantly affected it. Its opacity would make it ideal for adding an extra layer of privacy to a ground-level window, so consider the BDF or Greenfilm films if that’s important to you.
In our lab testing, the film wasn’t affected by cold or hot temperatures. When I scratched over the larger bubbles trapped under it, my finger didn’t rip through the material, and scratching didn’t leave any marks on the film. There were no signs of the film left on the glass after removing it.
Coavas claims that its film blocks 90 percent of UV rays and 85 percent of infrared rays, and has a visible light transmission of 12 percent, the lowest light transmission of all the products I tested.
Ease of use: I was pleasantly surprised to find that the installation instructions were printed in English, Spanish, and French. Upon further inspection, though, I found that the word film had been translated in Spanish to “película”—a movie—not “cinta,” the correct translation for this type of film. While this doesn’t affect your ability to install the film properly, it’s an interesting gaffe.
This was the clingiest film of the four tested. It took three attempts before I was finally able to install it on the window without it becoming unmanageably wrinkled while removing the backing or adjusting the position of the film. Because it was the thinnest of the four films, I’m not surprised that it was more difficult to work with. I don’t recommend installing this film without help. Small bubbles remained in the film after squeegeeing, but they weren’t noticeable from a distance.
The instructions lack directions for removing the backing, and it was only after I unraveled a significant portion that I found a more detailed instruction manual rolled up under the film.
Performance: Gila claims that this film “rejects up to 57 percent of sun’s heat” and “blocks up to 99 percent of UV rays.” It has a gray tint that’s a little less transparent than the BDF and Greenfilm products but doesn’t affect visibility through the window significantly. Like all the others, there were no signs of lifting or bubbles after prolonged cold and hot temperature exposures. The film also wasn’t damaged when scratched and left no residue on the glass.
Tips for a Neat Window Film Installation
If you’ve never installed window films before, there’s a learning curve to getting them on windows neatly. When I started testing, I applied, removed, and reapplied several of the films more than once, but after a week of daily installations, I found a few things that helped.
Clean the window really well. Any dust or debris on it will get caught under the window film. Squeegeeing the film won’t get this debris out.
Have an extra set of hands to help. Peeling the backing off a piece of film while spraying it with a soapy solution was extremely hard to do alone. If I didn’t spray the film enough as I was peeling (especially the thinner ones), the film stuck to itself and was difficult to separate.
When you think you’ve sprayed enough soapy water on the window and film, spray some more. Spraying both sides of the film and the window until they were soaking wet was the key to adjusting the film.
Squeegee from the center of the film in an organized way. Most of the films recommend pushing out any bubbles from the center of the film outward, but even when I did this, I had bubbles. This was because I was pushing water under the film in areas that I had just squeegeed over. Instead, starting at the top of the film and squeegeeing from the center toward the right and left of the film as I made my way down its length gave me the most bubble-free application.
Use a very sharp box cutter to cut any excess film around the edges. My measurements were a little off for a few of the film installations, which meant I had to cut the excess film from the window. Using a dull box cutter ruined the film because instead of cutting the material, it caused the film to bunch up and lift from the glass.
How We Tested Window Films
Our evaluation included assessing each film’s transparency, scratch resistance, and durability. During the installation and removal of each film, I made notes of how easy it was and whether the instructions included with each product adequately explained the process for me, a newbie in doing home projects.
Installing Temperature-Control Window Film
For the transparency, scratch resistance, and ease of use tests, the films were individually installed on a glass window pane in our lab. After installation, the films were left in a room at room temperature for several hours to make sure they remained adhered to the window and didn’t develop bubbles.
To assess durability, we installed the window films side by side on a glass window pane and placed them in a -2° F freezer for seven days. The windows were inspected daily for any lifting or formation of bubbles.
To determine if the window films could withstand higher temperatures, I applied direct heat with a blow dryer to the films for 30 minutes, focusing on the edges, to look for any separation from the window.