Best Window Insulation Kits
Covering your drafty windows with plastic can reduce your home's cooling and heating costs with minimal effort
When you shop through retailer links on our site, we may earn affiliate commissions. 100% of the fees we collect are used to support our nonprofit mission. Learn more.
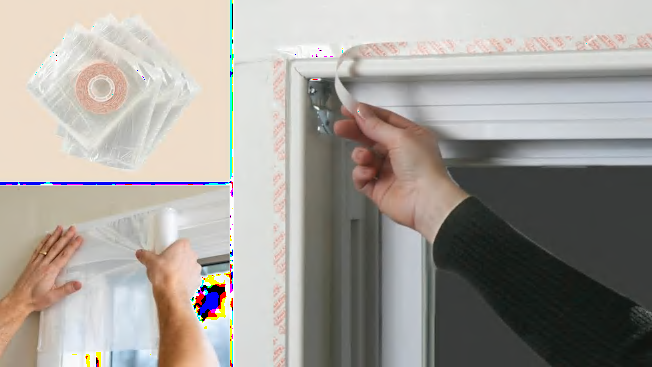
Drafty windows can make your home uncomfortable and significantly affect your heating and cooling bills. You can save an average of 15 percent on these costs when you seal the gaps around your home that are letting air in or out, according to estimates from the Environmental Protection Agency.
Window insulation kits allow you to seal off an entire window with a plastic film, not just the parts where there are gaps.
- Window Insulation Kits We Tested: 3M Duck Brand Frost King XFasten
- How We Tested Window Insulation Kits
How to Install and Remove a Window Insulation Kit
Ease of use: I’m going to go ahead and immediately call out the best thing about this insulation kit: The plastic film is packaged in rolls instead of folded sheets. There’s no measuring involved and no need to cut across large sections of plastic in a straight line (harder than it sounds). Instead, you apply the tape to the top of the window, roll the film across the tape from left to right, and cut when you’ve reached the right-most edge. Then all you have to do is unfold the plastic and press it onto the rest of the tape along the bottom and sides of the window.
The instructions were detailed and easy to follow. The film didn’t cling to my hands while I was handling it, and removing it from the window took little force. The adhesive on the double-sided tape is very strong, so once the plastic made contact with the tape it was difficult to lift it if I needed to do any repositioning. It didn’t leave any residue when removed.
Performance: Because of the tape’s adhesive strength, I wasn’t able to reposition the plastic sheet on the tape, so the installation wasn’t totally wrinkle-free. Some areas of the plastic were noticeably tighter than others even after applying heat with a blow-dryer. The plastic film didn’t have much of an impact on visibility through the window, but the wrinkles were noticeable from a distance. Scratching at the plastic left no marks. When I attempted to puncture the plastic with a sharp point, it didn’t rip but did leave an indentation.
After seven days in a -2° F freezer, the adhesive and plastic remained firmly in place. The additional application of heat with a blow-dryer (95° F) didn’t cause the tape to lose its adhesive strength.
Ease of use: The instructions for this kit were thorough, and while handling the unfolded plastic sheet was a little trickier than the Duck’s rolls above, installation was still easy. I especially appreciated the directions explaining which sides of the window to install the sheet on first, because this resulted in the neatest application of all the kits. In areas where the plastic wasn’t adhered to the tape as tautly as possible, I was easily able to lift it off the tape to readjust as necessary. After a blast from the blow-dryer, this kit had the fewest wrinkles. Removal was as easy as all the others and didn’t leave any residue from the tape’s adhesive.
Performance: This insulation kit didn’t affect visibility through the window. You can tell there’s a film over the window, but it’s very neat. Scratching at the plastic sheet with my nails didn’t cause any damage, and while there was a clear indentation where I tried to pierce the plastic with a sharp probe, it didn’t rip.
Durability under very cold and hot conditions was as good as with the three other products we tested. The adhesive and plastic sheet showed no signs of deterioration.
Ease of use: The instructions included with this kit were printed only in English, but they were clear and easy to follow. The installation process went smoothly. When the plastic sheet became stuck to a part of the double-sided tape that was a little out of place, lifting the plastic to make readjustments didn’t require any significant effort. After shrinking the plastic to the window, it remained taut long after I stopped blow-drying the sheet.
The plastic sheet didn’t cling to my hands while I handled it, making it easy to work with.
Performance: At $11.99 for 180 square feet of plastic (at the time of publication), this insulation kit is the most cost-effective option of the four we tested. As with the others, scratching and poking the plastic with a sharp point after installation didn’t cause it to rip. It also remained firmly in place under freezing temperatures for one week, and when hit with blasts of prolonged hot air.
Visibility through the window wasn’t affected by the plastic sheet. There were fewer wrinkles after blow-drying than with the 3M insulation kit, but it didn’t look as flawless as the Frost King product. As with the others, no residue remained from the tape adhesive after removal.
Ease of use: This was the only kit we tested that was labeled as being for a single large window measuring up to 6 feet, 8 inches by 19 feet, 6 inches. The instructions made installation trickier than I would have liked. First, they suggested unfolding the plastic sheet and cutting it to the width of the window. I found it difficult to cut through the large sheet of plastic and would have preferred to cut the excess off the window after I finished installing the film.
For the part of the installation process that involved attaching the plastic sheet to the double-sided tape, the instructions simply stated, “Apply film to tape. Reposition and stretch to remove wrinkles,” with no suggestions for starting at the top and bottom of the window like in the other film kits. After installing a few of these, I knew to start at the top and bottom, but I would have made a mess of the sheet during installation if it had been my first experience with window films. It wasn’t impossible to complete the installation using these instructions, but it definitely wasn’t the easiest.
While unfolding, the plastic sheet clung to itself and my hands more than the other products. The instructions on the packaging are printed in English, French, and Spanish.
Performance: As with all the other kits, after applying the heat of a blow-dryer for a few minutes, the plastic shrank neatly onto the window. But even after a longer blow-dry time than the others, a few long lines along the width of the plastic remained.
Scratching, poking, and prolonged cold and heat exposure didn’t affect the adhesive strength of the double-sided tape or cause the plastic to slacken from the window. When I removed the film, none of the adhesive was left behind on the window frame.
Photos: Jodhaira Rodriguez/Consumer Reports Photos: Jodhaira Rodriguez/Consumer Reports
How We Tested Window Insulation Kits
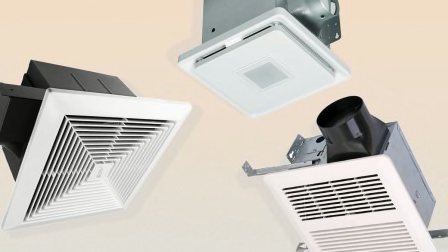
We evaluated these insulation kits across several tests, including visibility once installed, scratch resistance, puncture resistance, and durability. We also considered the ease of installing and removing them and the clarity of the installation instructions.
All of the insulation kits were individually installed on a 59x36-inch window in our lab. Once installed, the plastic was pierced with a sharp probe and scratched to determine how well it stood up against these kinds of contact.
To determine the durability, we applied a few inches of tape and plastic from each kit to a piece of aluminum and then placed it in a -2° F freezer for one week, checking daily to determine if there was any lifting. We also applied heat (95° F) to the adhesive tape of the kits for 30 minutes to see if prolonged heat exposure would cause the adhesive to lose its strength.