How to Install a Video Doorbell Camera
Consumer Reports walks you through the sometimes perplexing process

When you shop through retailer links on our site, we may earn affiliate commissions. 100% of the fees we collect are used to support our nonprofit mission. Learn more.

It’s easy to understand the appeal of video doorbells: You can see when a package is delivered and be alerted when someone is waiting at your door. But installation can be tricky, depending on the type of video doorbell camera you buy.
“Wireless video doorbell cameras are relatively easy to install—just charge their batteries, then mount them next to your door,” says Richard Sulin, CR’s testing leader for home security cameras. “Wired models require a little more work and being comfortable working with electricity.”
- Wireless Video Doorbells: How to Install Best Wireless Doorbells
- Wired Video Doorbells: How to Install Best Wired Doorbells
Consumer Reports has installed over 60 video doorbells from a wide range of distributors, and we’re here to tell you that although you can do the work yourself, we ran into plenty of head-scratchers following manufacturer instructions. So we’ve put together a step-by-step guide for installing wireless and wired video doorbells.
How to Install a Wireless Video Doorbell
Step 1: Charge the Doorbell’s Battery
Fully charge your doorbell’s battery before you mount it. Most models, including some from Ring and Eufy, come with a USB cable for charging the battery; you’ll have to remove the doorbell from the wall every time it needs to be recharged. Some doorbells, such as the Ring Video Doorbell 3, have a removable battery pack that can be swapped out or removed without dismounting the doorbell. Depending on the model and how much the doorbell records, battery life can last anywhere from one to six months.
Step 2: Mount the Doorbell Camera
The majority of video doorbells come with a mounting bracket that you affix to the exterior of your home. You might need to use your own (or supplied) specialized anchors and drill bits if you want to mount the doorbell on brick, stone, or concrete. Once the mounting bracket is firmly in place, attach the doorbell to it. One last important step: Attach the security screws that go into the bottom of the doorbell. These use a specialized screwdriver that comes with the doorbell and prevent someone from stealing it.
If you live in an apartment building or a rental property, it’s best to ask permission from your landlord before you mount the doorbell because they might not want you drilling into the exterior of the building.
Step 3: Set Up the Doorbell App
To receive the video from your doorbell on your phone, tablet, or computer, you’ll need to download the doorbell’s app on that device, and set up your account. Through the app, connect your doorbell to your home’s WiFi network. If you have problems connecting the doorbell or viewing the video feed, you might need to get a WiFi extender, which will boost the WiFi signal near the doorbell. It’s a common problem, one I ran into, because the outside walls of a home can block WiFi signals. Some brands, such as Ring, offer extenders that double as chimes for their doorbells.
Once you connect the doorbell, you’ll be able to customize settings to your liking, such as motion sensitivity (play with this setting so that rustling trees or passing cars don’t trigger a recording), person and package detection, and video recording length. In my experience, the default motion sensitivity is often set so high that every passing car gets picked up, which gets pretty annoying if you live on a busy street.
Consumer Reports recommends activating some important security settings and automatic firmware updates. Also use a lengthy and complex password, with various numbers and letters (not a simple password like "123456"). These steps will help prevent someone from hacking into your account. You can typically set up two-factor authentication, for example, which typically requires a one-time-use passcode that’s sent to your phone via text message.
Step 4: Plug In and Set Up the Doorbell Chime
Some video doorbells come with a plug-in chime; if yours doesn’t, you’ll have to buy one. The app on your phone sends an alert when someone is at your door, but a separate chime lets others in your household know when you have visitors.
Once you plug in the chime, follow setup instructions for it in the doorbell app. Usually, you simply connect it to your WiFi and pair it with your doorbell. Fun fact: Some of these chimes offer a variety of sounds ranging from the standard “ding-dong” to holiday jingles or even a howling wolf for Halloween or a gobbling turkey for Thanksgiving, which you can easily change in the app.
Wireless Video Doorbells From CR's Tests
Here’s a look at three popular models. For more information, see our video doorbell ratings.
How to Install a Wired Video Doorbell
Step 1: Find and Shut Off the Circuit Breaker for Your Existing Doorbell
Shutting off the circuit breaker that powers your doorbell will allow you to safely handle the electrical wiring. If you’re not sure which breaker the doorbell is on, try shutting off one at a time to see whether the doorbell still rings when you press it. You have found the correct breaker when the doorbell doesn’t chime.
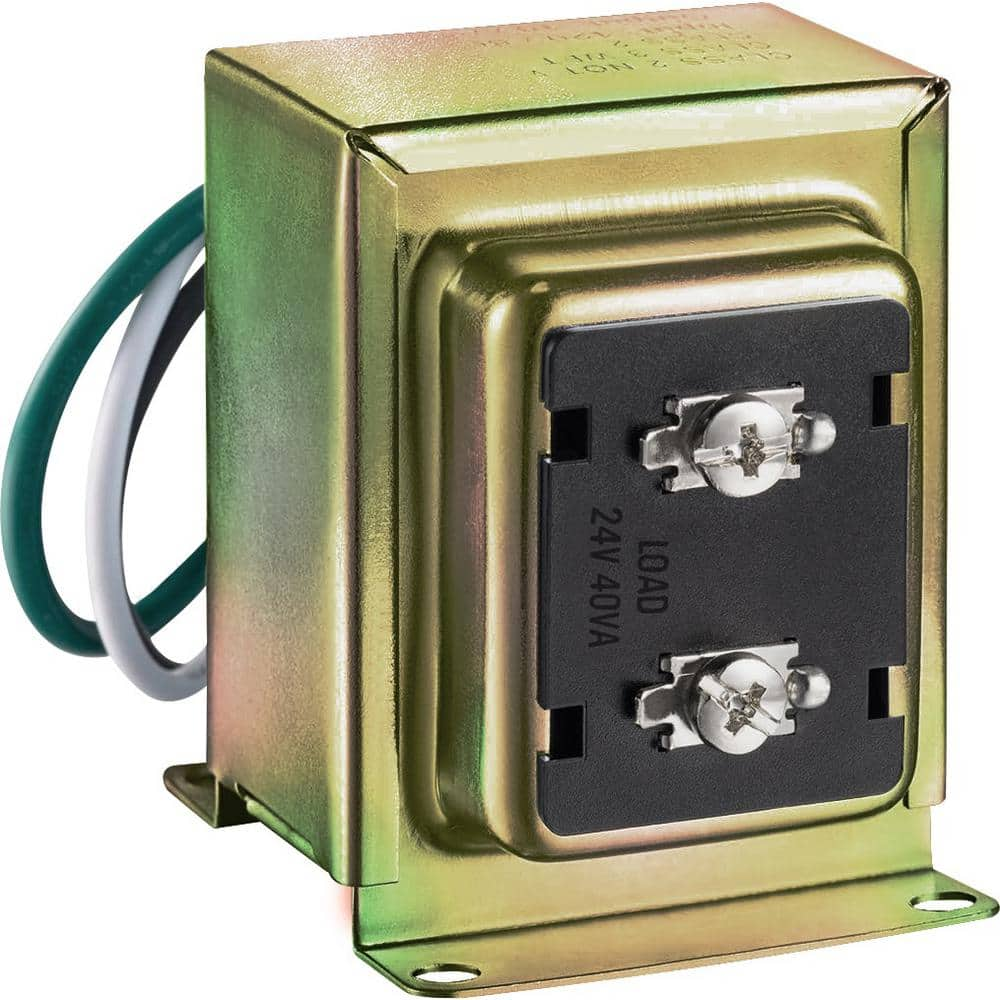
Step 2: Find and Inspect Your Doorbell Transformer
Use a multimeter set to "AC volts" (not "DC volts") and connect it to the two wires that are routed to the doorbell. You need to make sure your transformer provides the right amount of voltage for your new video doorbell, which is typically 16 to 24 volts. If it’s too low (below 16 volts), there won’t be enough power to make the doorbell work. If it’s too high (above 24 volts), it could overload and damage the doorbell.
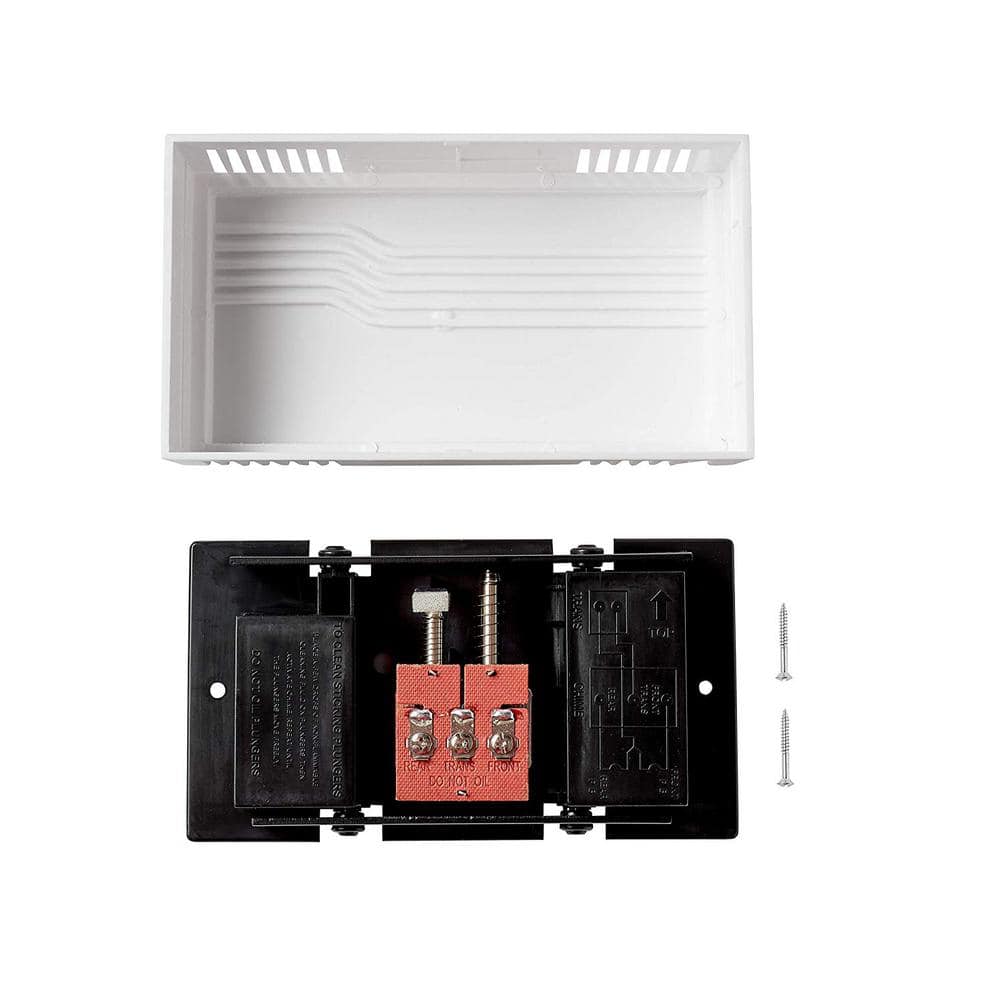
To find the transformer, open your doorbell chime box and try tracing where the wire connected to the “trans” terminal goes. (If you’re not sure where your doorbell chime is, turn the circuit breaker back on, ring the doorbell, and follow the sound to the chime. Just remember to turn the circuit breaker off when you’ve found the doorbell transformer.) If that doesn’t work, Sulin recommends you start by looking near the circuit breaker, because transformers are often installed there. You can also look around the unfinished parts of your home, such as crawl spaces and basements, where transformers are sometimes hidden.
Your transformer should have markings like “16-24V AC” to indicate the voltage. If you don’t see any markings, check the voltage with a multimeter ($20 to $40). If your transformer’s voltage is outside that 16 to 24 range, you’ll have to replace it. You can do this yourself by buying a new transformer at a hardware store (about $20) and reconnecting the wires from the old transformer to the corresponding terminals on the new transformer, or you can hire an electrician.
Step 3: Inspect and Rewire Your Doorbell Chime
Remove the cover of the chime (you may need to remove screws) and take a look inside to see whether it’s a mechanical or digital chime. Mechanical chimes have a small hammer that hits a physical chime whenever you press the doorbell. Digital chimes are essentially small speakers that play a tune. This step is important because it will determine what you need to do to get your new doorbell to ring your existing chime.
If you have a digital chime, you may need to install a special diode at the wire ends that connects to the doorbell, as is the case with the Ring Video Doorbell 3. A diode is a tiny electronic part with two wire leads. (The wire that connects the chime to the doorbell is usually labeled “front” in the chime.) Some video doorbells, such as the Google Nest Hello and Ring Video Doorbell Pro, come with a special adapter that you need to install in the chime itself, regardless of whether the chime is mechanical or digital. You’ll have to check the instructions to see what’s required for your video doorbell.
Step 4: Remove the Existing Doorbell
Unscrew your existing doorbell from the exterior of your house and disconnect the wires from the two terminals on the back of the doorbell. Just make sure that the wires don’t fall back inside the wall when you do so, or you’ll have a hard time getting them out. I almost lost those very wires on a few occasions; I finally learned to tape the wires to the wall while I kept working. If the wires are too short to work with, you may need to add extension wires using a wire nut that you can twist on, crimp on, or push on. You can find these extensions online or at your local hardware store.
Step 5: Mount the New Video Doorbell
As with wireless video doorbells, first you’ll need to attach the mounting bracket where you want your doorbell to be. Just make sure you pull the two doorbell wires through the hole in the center of the bracket before you attach the bracket to the wall. Again, tape comes in handy. Drill pilot holes and screw the bracket into the wall. With the mounting bracket in place, connect the wires to the two terminals on the back of the video doorbell. (It doesn’t matter which wire goes on which terminal.) Then stuff the excess wire into the wall and attach the doorbell to the bracket. Last but not least, screw in any security screws.
Step 6: Turn On the Power and Set Up the Doorbell Through the Smartphone App
You’re ready to turn the power back on at the circuit breaker and set up your new video doorbell. Download the doorbell’s smartphone app, create an account, and follow the instructions to set up the doorbell. (You can download the app on multiple devices.) It will connect the doorbell to your WiFi. (You may need an extender if your signal is weak.)
As with wireless models, you may want to adjust motion sensitivity in the settings (usually lowering it to prevent rustling trees from triggering an alert) and enable intelligent alerts, such as person detection or package detection. Last but certainly not least, Consumer Reports strongly recommends setting up two-factor authentication, if it’s available, to help protect your account from being hacked.
Wired Video Doorbells From CR's Tests
Check out these three high-scoring models. For more information on the video doorbells we test, see our video doorbell ratings.
")
")

")


")


")


